


Hello Everyone, and happy Monday!
It's that time again, time for

Please Welcome
Colleen from


Greetings from Canada eh! I'm Colleen from LemonThistle (a lifestyle blog featuring DIY, Parties, Decor and lots of babies)
I'm so happy that Allie has welcomed me over to share with you this fun (and really speedy) little project I've created. This leather and cork chalkboard is the perfect last minute DIY to spruce up your office, empty wall, or to whip up as a gift.
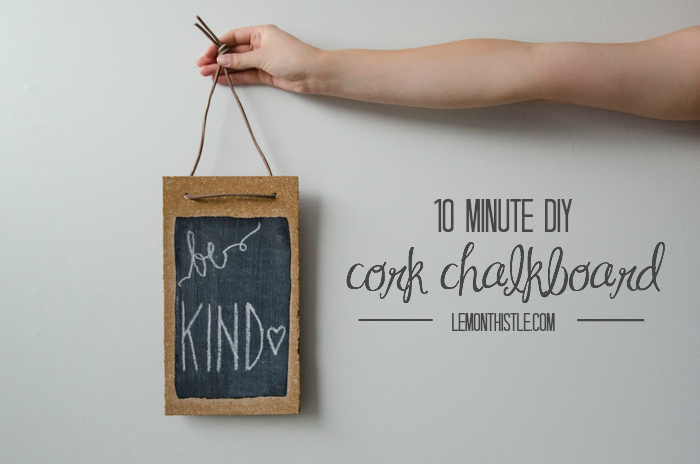
I used things I had kickin' around so this project cost me nothing. Zip, Zilch (the best kind of project). I used cork leftover from this vase - but a pack of four cork tiles was from the dollar store. I used leftover chalkboard paint from my giant party board- a whole quart cost $13. And I used leather cord that was actually a shoe lace from some old shoes my hubby was retiring (score!).
Let's assume you don't have these things filling up your closets- here's what you'll need:
Let's assume you don't have these things filling up your closets- here's what you'll need:
- 1 Cork Tile (knife and craft mat to cut to preferred size)
- 1 length leather cord (and screwdriver to punch holes)
- Chalkboard paint (and paintbrush)
- Chalk to write on your beauty
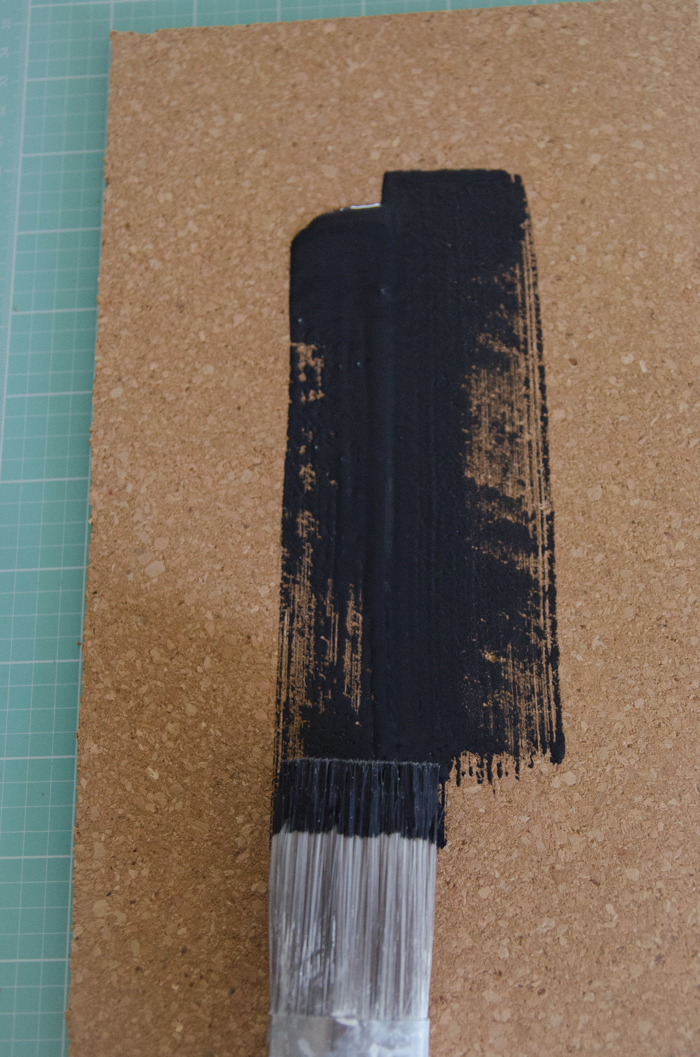
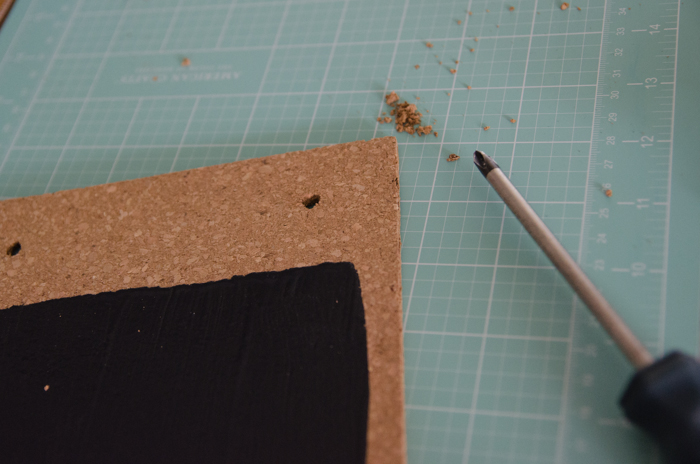
This project took me a grand total of 10 minutes (besides dry time), so I know you can do it! Just lay out your cork on your craft mat (or cutting board) and cut it to the size you'd like. I've found the best way to cut cork is to use a knife (craft knife or kitchen knife is fine) and press through the cork, working your way down the line (instead of dragging the knife through). You get less cork crumbles on the edge this way (much tidier looking).
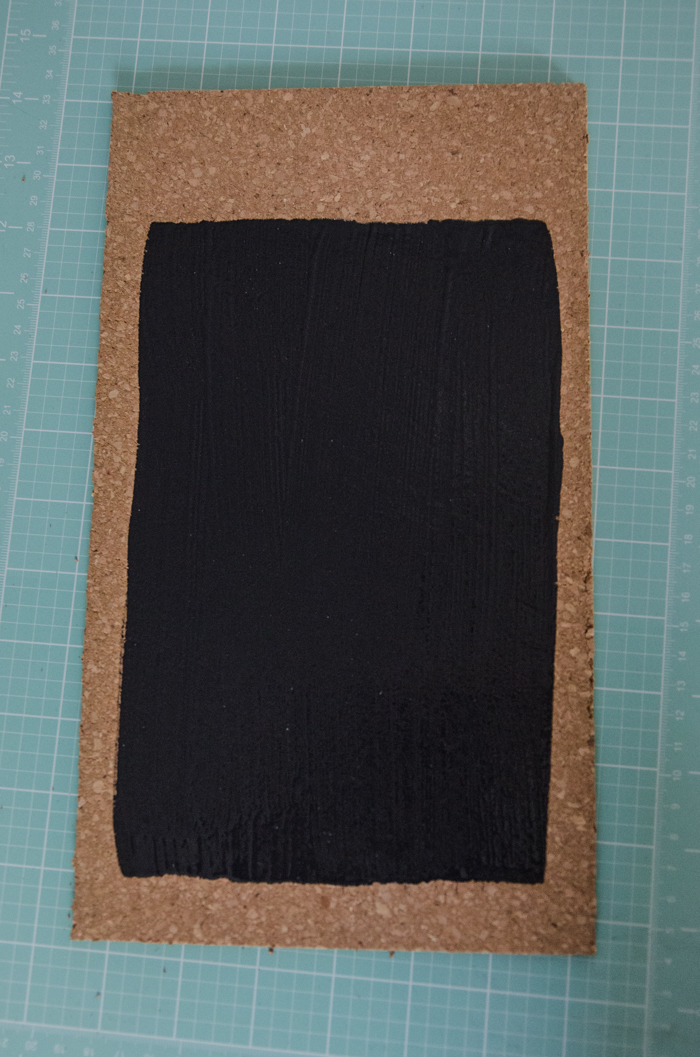
 After you cut the cork, you can paint on your chalkboard. If you'd like it to look like a perfect line, use painters tape. I was going for a hand-made look so made sure my lines weren't too perfect. Make sure you coat the cork in enough paint that the cork is completely covered.
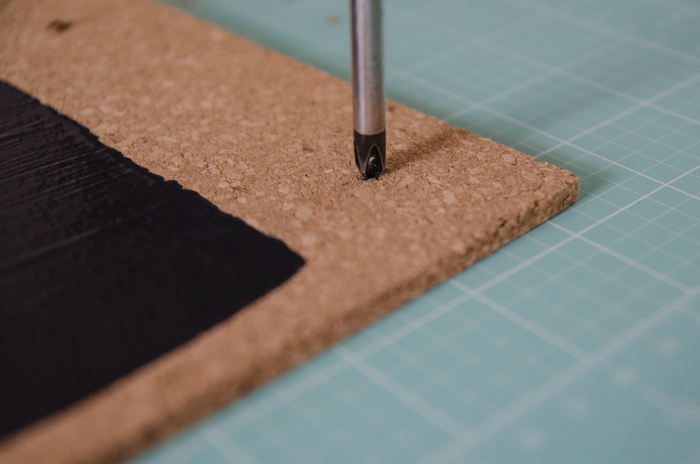
 While it's drying, you can decide where you'd like to punch holes for your leather cord, making sure the holes aren't too close to the edges. I used a screwdriver to make the holes in the cork. Originally, I tried a punch, but it didn't make a clean edge like a Phillips head did. I pressed it in, then gently twisted it (essentially drilling through the cork). Once you have your holes, thread your cord through and tie.
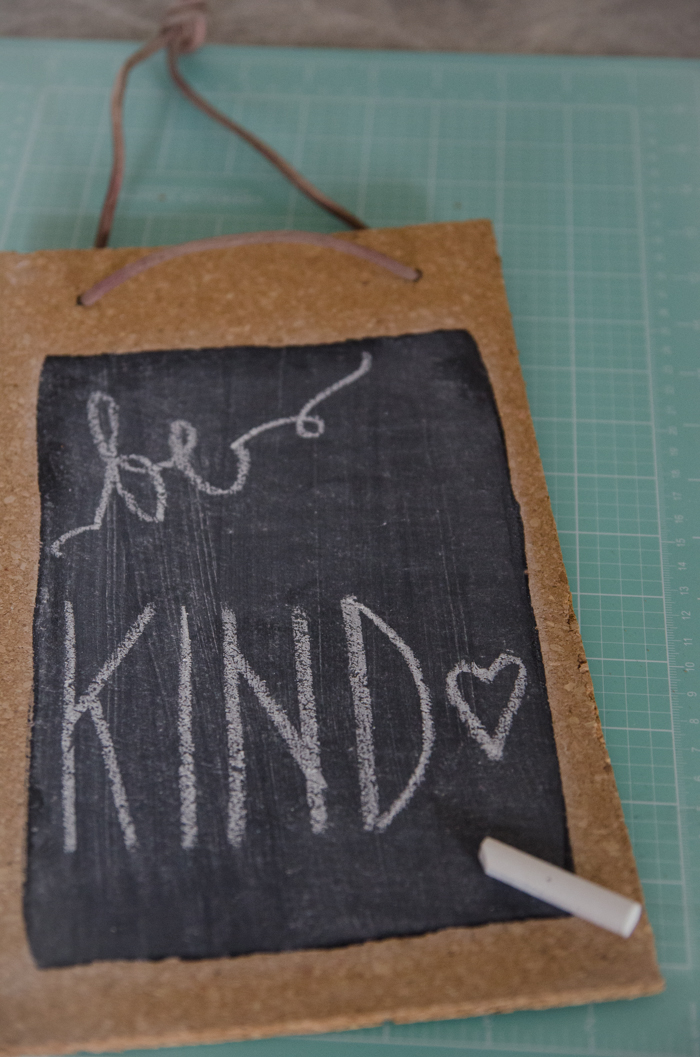
 Before you write on your chalkboard (or any chalkboard) make sure you cure it by rubbing the side of a piece of chalk all over the board, then wiping clean. If you skip this step it's near impossible to get those first words written off the board (I've tried to skip this step- silly me). Then your chalkboard is ready to be written on and loved!
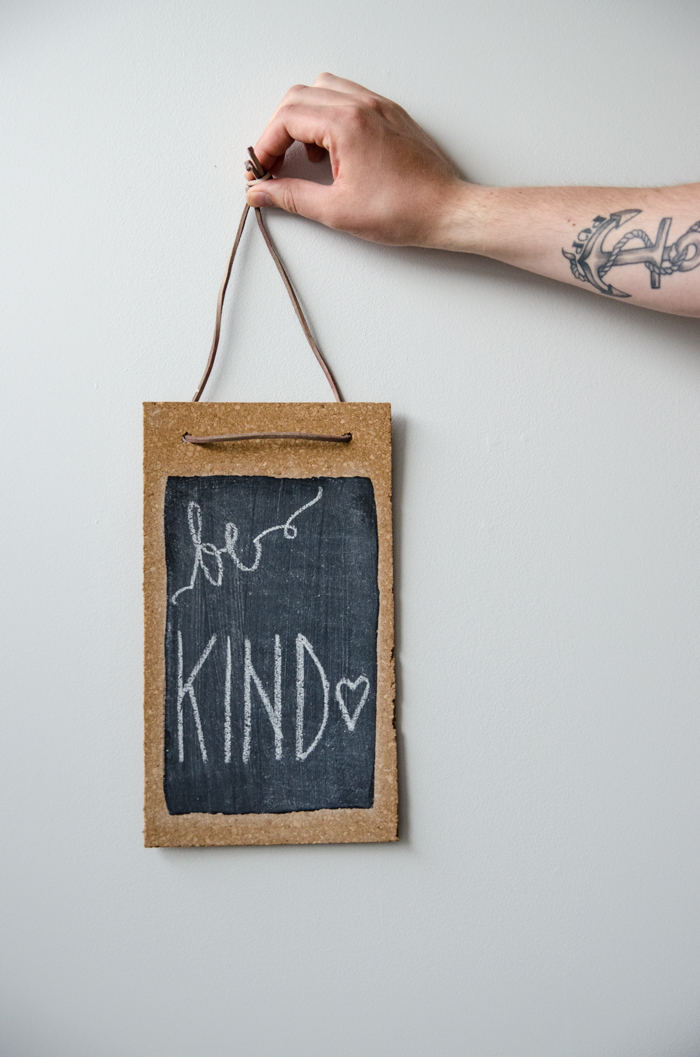
So simple, and I love the way it turned out. It's minimal fuss and will match almost any decor. What would you use yours for?
Happy crafting!

Thank you so much Colleen for coming on today. I love this idea, it's so simple,
yet so shabby!
Thanks again Colleen
and thank you all
for tuning in!
Until Next Time...
 Last Day to Link up to win
one of these Fabulous Wine Tumblers!

one of these Fabulous Wine Tumblers!
Love this idea and I <3 chalkboards:) Pinned
ReplyDeleteGlad you like it Michele! I'm a big fan of chalkboard projects :)
DeleteLike it! This is simple and doable! Thanks for the tutorial :)
ReplyDeleteThanks Helen! It's definitely do-able... thanks for taking the time to comment!
DeleteI'm thinking this would make cute gift tags or teacher gifts! Love this idea! Thanks for linking up to Cook it Craft it Share it! Have a great weekend!
ReplyDeleteA smaller version for tags would be adorable! Great idea!
DeleteThanks for linking up at the Bloggers Brags Pinterest Party!!
ReplyDeleteThat is such a cute chalk board! Thanks for linking up on Link It or Lump It! :)
ReplyDeleteSuper cute idea! Pinned. Thanks again for being a part of our party. Hugs! Lou Lou Girls
ReplyDeleteNot only is the idea genius, I love, love the font and handwriting. How fun to encourage our kids to work on their cursive and printing. Scribbles are so charming! Visiting via "ShareItSunday" linkup.
ReplyDeleteThanks so much Barb! You're too sweet :)
DeleteSuch a cute project! Loved seeing it on the Merry Monday party!
ReplyDeleteadorable :)
ReplyDeleteJust like Colleen’s simple DIY chalkboard brings order and style to any space, a thoughtfully written CV organizes your skills and experiences to open doors. The best CV writing service UAE helps highlight your strengths naturally, making your story clear and compelling without the fuss—because sometimes, simplicity is the key to making a great impression.
ReplyDeleteGreat DIY chalkboard idea, Colleen! Love the upcycling aspect. Quick, budget-friendly, and stylish. For a winter vibe, adding some rustic wood accents could evoke that Snow rider feeling! It would be interesting to see how it would pair. Thanks for sharing!
ReplyDelete