UA-59651954-28 Crafty Allie: September 2015

Wednesday, September 30, 2015

Easy Tips for Decorating Kid’s Room

Well hello and happy Thursday to you all!

Guess what I have???

And no it's not a piece of chocolate cake, it's too early in the morning for that! Oh who am I kidding its never to early for chocolate cake!!!

Okay seriously, today I am honored to have Author Tracey Clayton as my guest blogger.

So without further ado let's enjoy...


Easy Tips for Decorating  Kid’s Room 

Decorating a kid’s room is a particular challenge because they have to meet all functional requirements, but as well it has to be a pleasant environment in which a child can really enjoy themselves.


Create Themed Rooms

The thematic arrangement of a child's rooms is one of the best solutions for both the child and their parents. The room becomes transformed into a place where imagination turns into reality. 

In nurseries, Thematic Decorating options can vary depending on whether the child is a boy or a girl, as well as age, the child's personality, their preferences, favorite cartoon or movie characters. 

Children need to create an environment of the imaginary world in which their roles are becoming reality. In addition to decorating themed rooms, providing kids with props or costumes make them feel like their room is more like their own little kingdom, where they will spend time with pleasure. 

Decorate with your Child's Clothing
Decorating a child's room with their clothes is one idea that struck me as interesting. Frame small pieces of their clothing and place it on the wall. I don't think I could have parted with any of the beautiful dresses my girls used to wear, but now that they have outgrown them, they make for great decor on the walls. I’m also thinking of hanging up a clothing line and then change the colors often to match the colors with each season.  

Decorating with Scrabble Tiles


Click here for the full tutorial by Crafty Chic Mommy.

Use Scrabble tiles to create significant words such as your child’s names, or words like play, love, fun, etc. To do this, you will need  square plywood boards, and paint letters on them and add your choice of glaze. The possibilities of words can be endless, and it's a great learning tool for children. 

Decorating with Toys 
My girls have a lot of stuffed toys, and most of them they don't play with, so I decided to nail them to an empty part of the wall. Now, there is less clutter and it looks very nice as decor. 

Another great idea: when my neighbor didn’t know what to do with all of her son's toy cars so she bought a metal magnet bar (like the kind you would use for holding kitchen knives) she hung it in his room and stuck all of his cars to it. 
I thought it was a super neat solution.
See a similar tutorial by Keeping Up With The Souths. 

Decorating with Garland
Photo Source: A Beautiful Mess

 Colorful garlands are a resource that you should explore, they are perfect for lighting and fill any environment with color. Garland is made ​​with a variety of fabrics, colors and patterns. You can tack it to the wall, or hang it from one wall to another. 


 Creating an Art Corner

My girls have a special place where they put their artwork and it makes them so proud! It was very simple to do. I simply placed a sticker on the wall saying ‘Art Here’, there they are free to hang their favorite drawings. Every time my husband and I walk past it, we always act surprised and astonished to see their beautifully displayed art, this in turn makes our girls extremely happy. 

We are also thinking of creating a chalkboard wall, or at least a small portion of the wall, so that the girls can design their own ‘wallpapers’. 

Personalizing with Pictures
Photo Source: Am I a Funny Girl

I do not have ordinary pictures in mind. I saw this idea in some magazine and I think it’s brilliant! Kid’s shoes were placed in a frame going up from year 1 to year 7 and since I kept all of my kids’ shoes I’m definitely going to pick the best ones and make this clever decoration that will also prove to be a great memory for my girls when they grow up. 

 Organizing Collectibles 
Children really like to collect things, such as different kind of toys like bobble heads, animal figurines, cars , stickers, photos, etc. I believe that every parent should promote collecting when the right age has approached. Organization teaches neatness and order as well it teaches them to take better care of their stuff. Of course, it would be great if it became a family tradition, or if the child continued to collect things that a parent already gathered in childhood, though I doubt that I could interest my girls in collecting paper napkins. 

A child's room is a place where they develop their own mental and physical abilities. It should encourage creativity in children. It should also have enough space for  tracking the development of the child's personality, such as for playing, drawing, painting, reading, etc. 

Priority should be given to activities that the child prefers and the room should be set up in that particular style. 

Have fun decorating!!!


About author:  Tracey Clayton is a full time mom of three girls. She loves cooking, baking, sewing, spending quality time with her daughters and she’s passionate in writing. She is contributor on High Style Life and her motto is: “Live the life you love, love the life you live.” Find her on Facebook.

Thank you so much Tracey for guest blogging today!Such wonderful decorating tips!!!

And thank you all for tuning in today!
Until Next Time...


Tuesday, September 29, 2015

Worthwhile Wednesdays #88


Welcome, Welcome all to the 88th
Worthwhile Wednesdays Link Party!

Thank you so much for partying with me!!!

Friday, September 25, 2015

Pinbellish: A Pinning Celebration


Welcome to Pinbellish!

A Pinning Celebration

START:  Friday 7am EST | 11am UTC | Friday 7pm +8UTC 
END:  Monday 7am EST | 11am UTC | Tuesday 7pm +8UTC


What will you find at Pinbellish?


New things to embellish your Pinterest boards.

Show off your latest & greatest pins on multiple blogs.

We'll entertain you with weekly Pin Trivia.

Are you in? Then let's get to it!

Tuesday, September 22, 2015

Worthwhile Wednesdays #87


Welcome, Welcome all to the 87th
Worthwhile Wednesdays Link Party!

Thank you so much for partying with me!

Monday, September 21, 2015

How to Make a Crochet Beard


Yes, I finally have time for a real post.

Sorry, life has been... well Life.

Busy, busy, busy and its even busier because I'm squeezing in a bunch of crochet projects.

My family reunion is this weekend. If you've seen my past post on my reunions, then you know we do an auction to pay for the next years reunion.

This includes all sorts of items, mostly handmade.

It's a lot of fun, and challenges me to make something new.

This year I am bringing this crochet beard and knitted hat, a crochet blanket, and some crochet and knitted headbands with crochet flowers.

I hope they are a big hit. I am sure they will, we have a lot of gals that love this kind of stuff.

So, okay, okay, I'll get on with the pattern.

The beard is crochet but I will also include 
the link on how to make the hat 
(it is knitted with a crochet rim).

Okay lets begin...

You will need a size 5mm crochet hook, and worsted waste yarn.

First start out by chaining multiples of 2. 
Chain as long as you need it to be measuring from ear to ear. For this one I chained 30 but I think I could have gotten away with 28. It was just a tiny bit big.

For adult men you will need about 40 chains.
Women, around 35, and tweens 28, and small children I would do 20-22. 
But if you have someone to measure it on, then do so to makes sure it fits them.

Then in the next chain from the hook, crochet 1 half double crochet.


In then next chain you will do a three double crochet tog. 

First start out by doing a double crochet,
pull through 2 loops leaving two on the hook.


Then in the same chain space do another double crochet,
pull through two loops leaving 3 on the hook.


In the same chain space, do the last double crochet, pulling through two loops and leaving 4 on the hook, and then pull through all 4 loops.


The pattern will repeat until you reach the end...

1 half double crochet, then in the next chain space 3 double crochet tog, then in the next chain a half double crochet and then a 3 double crochet tog in the next chain space and so on and so on.


This is what it looks like after three bobbles.

When you have come to the end of that row...


Chain one, and flip it over.


Crochet a single crochet into each stitch, not chain, each stitch.

The stitches run together, so be careful not to skip any stitches.


After the third row, chain two and flip it back over, and repeat the half double and 3 double crochet tog pattern until you have reached the end of the row.

Repeat patterns 2 and 3 until you reach the desired height.

For adults I would recommend 9 rows total (including the very first chain row).


Now fold it into threes to measure where the mustache will go.


Mark the stitches with yarn or marker clips.


Single crochet until you reach the first marker and slip stitch into the marked stitch.


For this size I chained 8 and then slip stitch into the next marked stitch...


and then continue on with single crochets into each stitch until you reach the end of the row.


Chain 2 and repeat the half double and 3 double crochet tog pattern.

You will go all the way across and even crochet the half double and tog pattern into the chain.


At the end of the row chain 10 chains and connect it across to the bottom of the beard. 
Repeat on the other side.


These will go over your ears to
 keep the beard in place.


Now... to make the hat.

This was made on my knifty knitter loom. 
Click here to see the tutorial.

On the bottom part I did a single crochet all the way across for 3 rows. I did this after I took it off the loom.

Thank you so much for tuning in!
Until Next Time...


Tuesday, September 15, 2015

Worthwhile Wednesdays #86


Welcome, Welcome all to the 86th
Worthwhile Wednesdays Link Party!

Thank you so much for partying with me!

Tuesday, September 8, 2015

Worthwhile Wednesdays #85


Welcome, Welcome all to the 85th
Worthwhile Wednesdays Link Party!

Thank you so much for partying with me!

Friday, September 4, 2015

Copy Cat Bath and Body Foam Soap


Well Hello and Happy Friday!
Thank God for this long weekend right?

My kiddo's are super excited to have 3 days off, and so is Mama!

Anyway, today...
I wanted to show you a little hack I have been doing for a while around my house.

It's so super cheap too!

I've been making my own foam soap that smells just as good as the real stuff (Bath and Body).
At $6.50 a bottle that can really add up. The way I am going to show you, it will only cost 33 cents per bottle. 
Heck ya, that's a huge difference.

So lets begin.

If you don't already have some foaming soap bottles, then you can buy these at a dollar store.
The soap however that comes in it is almost scentless. It way to cheap.
But the bottle will come in handy so save it. 

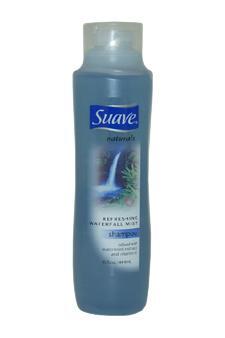
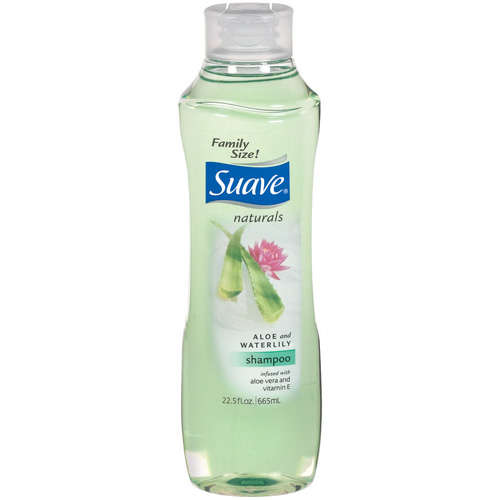
Then while you're out get some Suave fruit scented shampoos, like these.
They will run you about $1 to $1.50 depending on the size.

But the $1.50 ones will have more ounces, so you're only paying more for more shampoo, not less.

Then fill about 2/3 of the bottle with shampoo.

Then fill 3/4 of the bottle with water.


Get a lovely assistant to shake them up for you.


Once the bubbles have settled, add a just a little more shampoo to top it off and shake it up again.

And now I have yummy fruity smelling foam soap, for pennies.


Sshh don't tell my guests. I put this recipe back into the B&B bottles and they really never know the difference!


Also if the fruit smelling ones aren't your thing, they have plenty of scents to choose from.

And Look out for these flavors for the holidays...

Thanks so much for tuning in!
Until Next Time...


Related Posts Plugin for WordPress, Blogger...