UA-59651954-28 Crafty Allie: February 2015

Tuesday, February 24, 2015

Worthwhile Wednesdays #57


Welcome, Welcome all to the 57th
Worthwhile Wednesdays Link Party!

Thank you so much for partying with me!

Sunday, February 22, 2015

The Best and Easiest Chili Recipe Ever

Calling all Chili Lovers!!!


I just can't tell you how much my family and I love Chili. 
My son asks for it once a week, but I of course 
make it every two weeks, because who am I kidding, I love and want it weekly too.

This is the easiest by far Chili recipe ever. It can be made in a pot over the stove or a crockpot.

So lets begin...

Ingredients:

1 pound of lean ground beef
3 can of Rotel (or generic tomatoes and green chilis)
2 Cans of Bush's Chili Beans (any brand will do)
2 packets of mild Chili Seasoning 
(or hotter if you prefer)

I get all of the ingredients and 
just dump them into a pot or the crockpot.

Do not drain the cans of rotel or beans.

You do not have to cook the meat separately, in fact, I like to cook it all together as I like the consistantsy better.

Add in about 3/4 cup of water.

Stir all of the ingredients together, and 
start off cooking it over the stove on 
about level 8 for 15 minutes.

Stir vigorously every 4-5 minutes.

After 15 minutes then put it down to a level 5 for another 15-20 minutes, stirring every 5 minutes.

After 15-20 minutes lower it all the way to level 
1 or 2 and let it cook for at least 2 hours. 
However the longer the better.

For a crockpot, mix all the ingredients together and  place on medium. Stir every 10 minutes for the first 30 minutes, then lower it to low for the remaining time.  
Allow to cook for about 4 hours 
if cooking by crockpot.


Now a favorite in my house, is to serve it with rice, 
fritos, cheese and green onions.

For the four of us I make about 1 1/2 cups of white rice.

I put a small amount of cooked rice in the bottom of each bowl, then put the chili over the rice, add cheese (shredded monterey and cheddar cheese) and cut green onions and Fritos around the side.


And boy is it yummy!
 My son and husband always go back for more.

I also occasionally make this for
 potluck Thursday at work. 

I bring the main ingredients and everyone else brings the chips, cheese, rice, and green onions.

I bring my crockpot to work and check 
on it about once a hour. So easy!

Thanks for Tuning In!
Until Next Time...


Thursday, February 19, 2015

Our Favorite Things Pinterest Party

Our+Favorite+things+Pinterest+Party 640

Our Favorite Things Pinterest Party {7} is Live!!


And you have some great hosts, including myself (obviously), that I want to make sure I introduce.

 They are:


Be sure to stop by and comment on their blog. Show them the love and they will do the same for you! Are you ready now for the party?!?!? Before we get started, lets see who each of the Hosts chose as their Feature Pins from Our Favorite Things Pinterest Party {6}. 


Denise Designed chose the 
DIY two tone table makeover


Lou Lou Girls chose this 


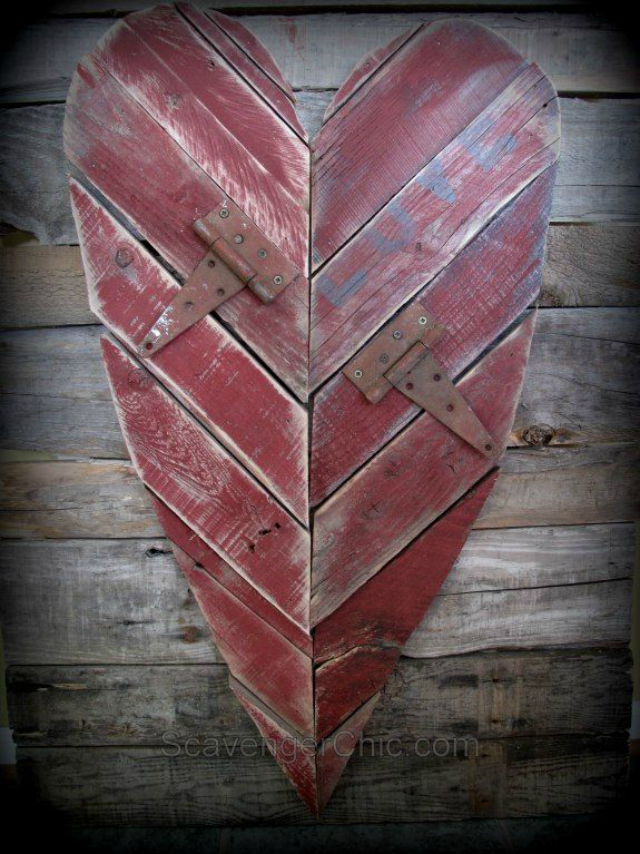
Redo It Yourself Inspirations chose this Reclaimed Wood Pallet Heartreclaimed wood heart

Carissa Miss chose this 
Handwritten Free Calendar Printable. handwritten printable calendar


My Turn for Us chose the 
Charleston Red Rice Paella. charleston red rice paella

Crafty Allie chose the 
How to Make your own Twister Game. how to make your own twister game


Gina's Craft Corner chose this 


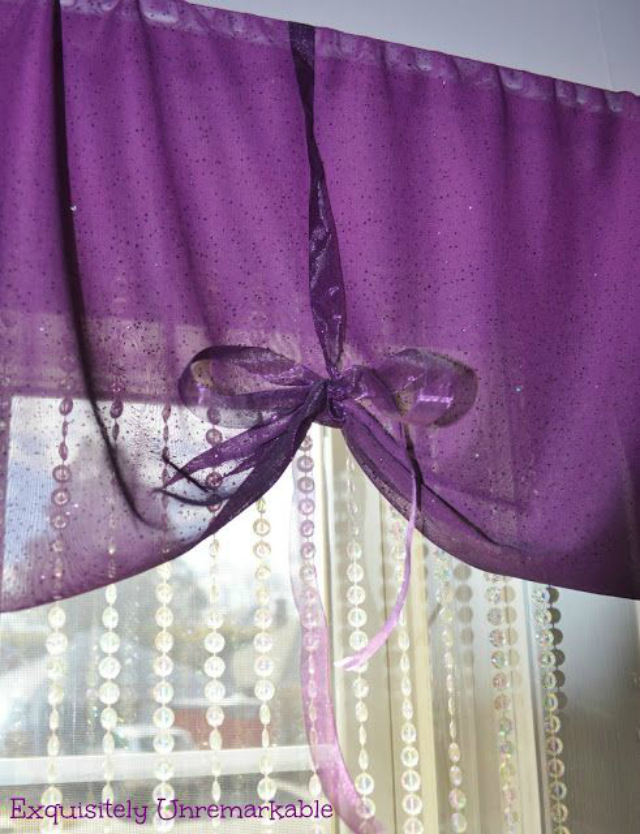
Purfylle chose the Super Easy Ribbon Valance. ribbon valance


View from the Fridge chose the 
Cucumber Mint Moscow Mule. cucumber mint moscow

So how does this Pinterest Party Work?
  1. Follow each of your hosts on Pinterest.
  2. Link up 6 of your favorite pins.
  3. Re-pin at least the 6 pins before yours (but feel free to pin more).
  4. Not a requirement, but it would be great if you could pin the features as well.
  5. Each host will pin 25 of their favorites and will choose a favorite to feature in the following party.
Please note that...
  1. Pins must be linked to the Pinterest pin, not your blog.
  2. Those that are not linked to Pinterest will be deleted.
  3. Pins must be your own, not someone else's.
That's it! You can follow your hosts here:


Let's get this party started!


Thanks so much for tuning in!
Until Next Time...

Wednesday, February 18, 2015

DIY Crochet Headband/Ear Warmer


I am sure most of you remember my knitted headband, right?

Well, I'm back but with a crochet
 pattern instead, yay!

I think I actually like the crochet better, 
however it does take a little longer.
 But that's mainly because I'm a slow crocheter.

So lets begin!

You will need a Size H Hook...

First chain 64 links.


Then with your chains facing the same direction join to form a circle.


Slip stitch to join the circle.


Chain two and crochet a half double crochet into each chain.


Continue on and slip stitch at
 the end of each round.

Crochet a total of 10 rows.

After 10 rows, chain 1 and slip stitch 
into each chain for a finished look.


Now for the flower..

I love making crochet flowers, eek!

Ok, so start off with a magic ring 
using your H hook.


Crochet 8 half double crochets into the ring.


Then pull your starting string.


Then slip stitch into the first half double crochet.


Chain 1 and crochet a single crochet 
into the next chain.
In the same chain crochet two half double crochets and then one more single crochet.


Skip one chain, and then repeat: one single,
 two half doubles and then a single.

Continue skipping one chain and repeat the pedal pattern. You will want only 5 pedals.


Slip stitch to join the flower into the 1st chain.


Chain 1, and flip over to the back side. Find the post from the first 8
 half double crochets that you did into the magic ring. Crochet a single crochet going behind each post. Chain two and repeat on each of the 8 posts.


Slip Stitch to the first chain 1 to join.

Flip it back over and chain 1, and crochet 1 single into the first opening
 (the chain two in between each post).

In the same opening, crochet three double crochets and another single.

Repeat 7 more times on each opening:
One single, three half doubles and another single.

Slip stitch into the 1st chain to join.


Chain 2 and flip it back over to the back side. 
Crochet a half double crochet
 into the previous 8 posts. 
Like you did in the first time,
 but this time you will
 use the new 8 posts.
Chain 2 and repeat half double, then 2 chains for the next 7 posts.
Slip stitch into the 2nd chain, to join.

Chain 1 flip it back over to the front, 
and crochet a single, 4 half doubles and another single into each 8 of the posts.
 And slip stitch into the 1st chain to join.


Chain 3, flip it back over to the back side and this time you will crochet a double crochet into each 8 of the new posts, and chain 2 in between each post.

Slip stitch into the  3rd chain to join.

Chain 1, and flip it back over.

Now the pattern will be, a single, 5 half double crochets and another single.

Repeat pattern into all 8 openings,  and slip stitch into 1st chain.


Cut a long (about 2 feet) and pull 
your yarn through to knot it.

Now that your flower is done, you can attach it to your headband either by a clip or by sewing it on.

There are two ways to sew it on:
1) By using a yarn needle
2) Or use the crochet hook to weave it in out and out all the way around.

Note: I picked up the 3rd layer when sewing it, every other pedal to minimize movement.


Thanks so much for tuning in!
Until Next Time...

Tuesday, February 17, 2015

Worthwhile Wednesdays #56


Welcome, Welcome all to the 56th
Worthwhile Wednesdays Link Party!

Thank you so much for partying with me!


Happy Fat Tuesday!


Thursday, February 12, 2015

DIY Heart T-Shirt


There's nothing quite like the feeling of 
waiting till the last minute. 
I've had the shirt for 3 weeks, 
and bought the paints last week, 
but yet here I am finally 
finishing my daughters Valentine's Shirt.

I started it on Tuesday, and just now got 
around to taking the pictures of her in it.
Yep, I know, I know I'm a PROCRASTINATOR.
At least I admit right?

Well anyway, this shirt was super easy to do, 
so let me walk you through it.


First, get a color t-shirt of your choice. 
Then, get two similar colors of paint. 
A base color and then a similar matching 
glitter paint. The ones I got were 
Magenta by Craft Smart and 
Turmalina colored Glitter acrylic 
paint by Martha Stewart .

Then on my cricut machine I cut a cute 
heart out using plain clear contact paper.
If you don't have a cutter, you could also print out a heart
 and trace it onto your contact paper.

Place the heart in the center of your shirt about 
2 inches away from the collar. 

First I painted it with the magenta color.


Then I let it dry for about 6 hours, 
it was still ever so slightly damp, 
but dry enough to apply the glitter paint.

I applied 1 coat of the glitter paint.


I let it dry for about 2 more hours and then 
applied one more final coat.


It wasn't fast, but is was super easy, 
and now my daughter 
has a new shirt to wear tomorrow.
She'll be wearing it over a black long 
sleeve shirt so she stays warm, but she 
can still wear it in the spring and 
even the summer as well.

Thanks so much for tuning in!
Until Next Time...


Tuesday, February 10, 2015

Worthwhile Wednesdays #55


Welcome, Welcome all to the 55th
Worthwhile Wednesdays Link Party!

Thank you so much for partying with me!

Sunday, February 8, 2015

Valentines Card with Rainbow Loom Bracelets

Well, hello and Happy Monday, 
I hope your weekend was great!

I got to get out and enjoy some of our warm, sunshine, but windy weather.
We went on a weekend camping getaway 
and boy was it good to be out of this prison, 
I mean house.

Anyway, in my down time this weekend, I got to make some rainbow loom bracelets. I made them to go with my daughters Valentine's card


These bracelets are easy to make 
and they are kind of addicting. 
If you are organized with your colors and have them all out and ready in the order you want them in, then you can make about 3 bracelets and hour.

I watched a few hours worth of Preacher's Daughters, and made quite a few!


I wish I could explain how to make them, but since I can't here's a video 
from DXDutch on You Tube.

I love all the colors!
I also spent a few hours organizing of all my daughters loom bands.

Rainbow looms are cheap if you buy them online, as well as the bands.
Here's a organizer, and lots and lots of bands.


And of course you'll need a loom.
This one comes with the loom and 2200 rubber bands, wowzer!


And the best part is I'll give you the printable
 that I've designed for free.

Unfortunately, I don't subscribe to Adobe to give you the pdf downloadable form; however simply right click and save as to grab the image.


I printed mine out on card stock and selected 
3.5 inches and put 4 on a page. 
They are the perfect size!


Thanks for tuning in!
Until Next Time...


Related Posts Plugin for WordPress, Blogger...