UA-59651954-28 Crafty Allie: how
Showing posts with label how. Show all posts

Friday, September 4, 2015

Copy Cat Bath and Body Foam Soap


Well Hello and Happy Friday!
Thank God for this long weekend right?

My kiddo's are super excited to have 3 days off, and so is Mama!

Anyway, today...
I wanted to show you a little hack I have been doing for a while around my house.

It's so super cheap too!

I've been making my own foam soap that smells just as good as the real stuff (Bath and Body).
At $6.50 a bottle that can really add up. The way I am going to show you, it will only cost 33 cents per bottle. 
Heck ya, that's a huge difference.

So lets begin.

If you don't already have some foaming soap bottles, then you can buy these at a dollar store.
The soap however that comes in it is almost scentless. It way to cheap.
But the bottle will come in handy so save it. 

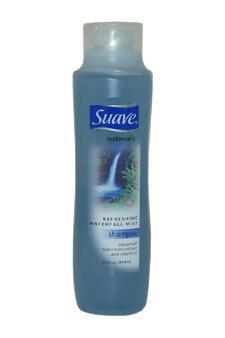
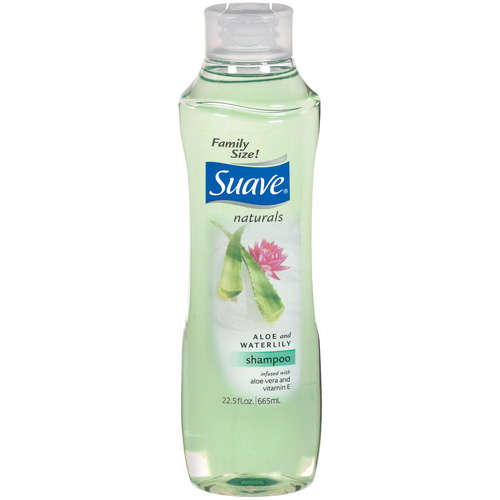
Then while you're out get some Suave fruit scented shampoos, like these.
They will run you about $1 to $1.50 depending on the size.

But the $1.50 ones will have more ounces, so you're only paying more for more shampoo, not less.

Then fill about 2/3 of the bottle with shampoo.

Then fill 3/4 of the bottle with water.


Get a lovely assistant to shake them up for you.


Once the bubbles have settled, add a just a little more shampoo to top it off and shake it up again.

And now I have yummy fruity smelling foam soap, for pennies.


Sshh don't tell my guests. I put this recipe back into the B&B bottles and they really never know the difference!


Also if the fruit smelling ones aren't your thing, they have plenty of scents to choose from.

And Look out for these flavors for the holidays...

Thanks so much for tuning in!
Until Next Time...


Thursday, May 14, 2015

Double-Sided Fabric Headbands

how to make fabric headbands


Well, Hello there and TGIF! 

I've had a few things on my crafting wish/to do list, and this was at the top of it!
My daughter, while she can be very prissy, can also be a bit of a TOM BOY.
She is pretty much fine with just a pony tail every single day.

She will occasionally let me put a flower or bow in her hair if it matches her outfit, but she quickly takes it out because she said its hurting her head.

But when I purchased a similar headband recently, she wore it all day long.

And I was like 
"Yes, finally, I've gotta make this 
girl some headbands!"

These are super easy to make.

The best part about making these headbands is you can use fabric fat quarters, and of course...
your left over fabric scraps.

fat Quarters fabric headbands

First off let me just tell you how addicted I am to Fat Quarters.
At Joann's you can buy them for $1, so you can buy a lot. I tend to spend at least $10 in fat quarters every time, I go.
I mean just look at the pretty patterns, eek!


You'll also need some kind of elastic.
I use the fold over (baby headband elastic)


For kids headbands I cut about 5 inches.

I've made a template, and all you have to do is right click to save the image and print it.
Actually you can just print it right from here.

If you are a Windows PC user then when you print, select full page so its the correct size.

free printable fabric headband pattern

It's best to print this on card stock so you can easily trace it onto your fabric.
I usually fold mine inside out, so the marks are on the right side. 

Fold your fabric, and place the wider end where the arrow is on the fold, trace it and cut it out,
you'll need two of these.

free fabric headband pattern


To make it reversible cut the second one out in a different pattern.

Place the right sides together and pin your elastic on one side pointing long side downwards.
I leave about 3/4 inch of the elastic hanging out.
how to sew a chevron fabric headband

pin elastic to fabric headband

Using your sewing machine footer as your guide place the footer on the inside of the footer,
 and sew the sides of your headband.

sewing a fabric headband


Now, again place the footer on the inside right edge footer and sew from each stitch on the sides to each stitch across the top where the elastic meets.


Turn it inside out, 
turning fabric headband inside out

and tuck in the ends into the headband.

fold in ends of fabric headband

Place the other side of the elastic (make sure not to twist) and pin together to make sure it stays secure.

inserting elastic for fabric headband

This time I tend sew to as close as the edge of the fabric as possible and I sew it back and forth about 4-5 times to make sure its nice and secure.

Then snip off all your unwanted strings, 
iron it to keep the seems in place,
and you're done! 

chevron fabric headband

If you notice closely in the other photos I have stitching on the ends, this was because I was doing it the hard and WRONG way. But you can stitch on both sides all the way up and down if you want a stitched look.


My daughter loves that she can go and choose either side.


I made one for her friend, and she's been wearing it daily. Hmm, may need to make her more too!
girls posing in fabric headbands peace signThanks so much for tuning in!
Until Next Time...


Monday, April 6, 2015

Vera Bradley Tablet Case Hack


I just love the style of Vera Bradly!
But I don't love the price too much.

I mean this same, well similar case cost $30. 
I mean wow, your paying for her name.

Well, I made a similar case for guess what, 
$0.
Oh ya, baby!

Ok, lets get started.

A Big THANK YOU, to my Grandma for giving me two big boxes of Vintage Scrap Material.
I am loving it all, and have decided to use this piece for my case!


And in that box, some thinner batting material.

I made my case for a 7 inch tablet. 

I cut both pieces 12 1/2 inches x 10 inches.


First start out doing diagonal lines.
I used the footer as my guide to space the lines.


This is what your piece will look like when you have completed the one set of diagonal lines.


Now turn your work the other way around, and make diagonal lines going the opposite way.

That will make your X pattern.

For the inside, I chose a similar color and made it the same size.


I drew a line down the middle so I would know where the fold goes.

I cut a piece to go inside the to hold the tablet, and ironed the edges.

On one side of the width I sewed it where the opening goes.


and then pinned it to the pink fabric and sew all the way around except for the opening.


Now its time to sew the front and inside together.
Match up the pattern side to the front side of your inside fabric (right sides together).
Sew 1/4 inch all the way around except for the last 6 inches.
Cut your corners so they lay right when you flip it.
Flip it right side out and then fold and pin the two fabrics together and sew.
And there you go, 
now you have your very own case! 

Thanks for tuning in!
Until Next Time...

Monday, January 19, 2015

Guest Post: DIY Bookcase Makeover


Hello all and Happy Monday!
I hope you had a fabulous weekend.

To start this week off right,
I have the tremendous honor of having 
Sommer Poquette, 
blog author of 

Today, she'll show was what a little cleaning, 
and TLC will do to an old bookcase.

Take it away Sommer!


How to Give an Old Bookcase a New Look. Photos Courtesy of Sommer Poquette


Do you have a book shelf or bookcase that is in need of a fresh look? Maybe it's been sitting in your basement loaded with junk and you've just avoided it. Heck, you can't really see the chips, dings and scratches under all the toys, books and puzzles anyhow. Perhaps you're like me and you found an old bookcase at a flea market or garage sale and you had to have it, but now it's sitting in your garage collecting dust.


An old bookcase can be a treasure, or it can collect dust and be an eyesore. I have one of the latter that I'm tired of looking at. It is piled with toys and needs a fresh new look. This was my husband's childhood bookcase, making it over 30 years old, so it's also an heirloom we've hung onto during moves. I've decided to freshen it up to match some of the weathered, vintage and distressed pieces I have in my home. I like the 'country chic' look and have old industrial lockers in my home, a farm door as a mirror and an antique wash basin as a laundry room sink, to give you an idea of the feel I'm going for.

So where do you begin if you're like me and you want to redo an old bookcase and give it a breath of fresh air?

How to Give an Old Bookcase a New Look 
Step 1
1. Clean your bookcase with a good degreasing soap or cleaner. Good old-fashioned elbow grease is in order. The bookcase might not look dirty, but it is! Scrub it down and remove any grime that has built up over the years. I recommend using a sponge with a soft scrubby side to it so you can really rub away the dirt.


How to Give an Old Bookcase a New Look 
Step 2

2. To sand or not to sand? I'm going for a weathered and distressed look, so the dings, scratches and dents will add to the look I am trying to achieve. Sanding will smooth the wood out and give it a cleaner look. I want it to look a little beat up and I'm too lazy to fill all the dings. Crazy, huh? I'm trying to give a bookcase a fresh look but I want it to look old. It will look "new," but an older type of new... this is what I'm telling my husband, anyhow.


 DIY Bookcase Makeover 
Step 3


3. Choose your paint. This was the hardest part for me because I don't want to have to paint this twice. I'm known for changing my mind or not liking the first color I pick. I also don't like to do extra work, so I needed something that would cover the dark wood and prime it at the same time. It just so happened I had a professional painter at my house painting my bathroom (because I disliked the first color) and our new barn style bathroom door and he suggested BEHR Paint and Primer. He was using it for my door and we chose Interior Satin Enamel – Cottage White (W-F-310). I decided to go with the same color, to use what I would have left over from my new bathroom door (and save money). Also, the cottage white over the dark wood would create the weathered and distressed look I like.


DIY Bookcase Makeover - 
STEP 4

4. Roll up your sleeves; it's time to paint! I decided to use a cheap foam roller and foam brushes and lightly cover the bookcase with one coat and then let it dry. I recommend doing one coat at a time to see if a) you like the color, and b) is it giving you the look you desire. In my case, I used two coats of paint. That was just enough to cover the dark wood and still leave some showing through the paint.


 DIY Bookcase Makeover Final Product
It's amazing what just a couple coats of paint will do to a bookcase. For me, it made something old look new again (okay, old but new to me). To help achieve the distressed look after I painted and it dried, I used light sand paper to rough up the paint on the edges where you might naturally see wear and tear. I opted to not add a protective of paint because I want the paint to chip naturally. Remember, I like the older look.

In the end, I have a "new" bookcase to match the look and feel of my home. It was a fun project that paired perfectly with some great music and a glass of wine, and I'll continue to enjoy my revamped bookcase for years to come.


Sommer Poquette is a "green-and-clean" mom blogger who writes about her DIY projects, including bookcases, for Home Depot. Sommer has a passion for all things vintage and has been known to disappear into an antique shop for hours. 


You can view Home Depot's selection of bookcases on the company's website.

Thank you so much Sommer for guest blogging today! It has truly been an honor!

Thanks so much for tuning in!
Until Next Time...

Related Posts Plugin for WordPress, Blogger...