Well, Hello there and TGIF!
I've had a few things on my crafting wish/to do list, and this was at the top of it!
My daughter, while she can be very prissy, can also be a bit of a TOM BOY.
She is pretty much fine with just a pony tail every single day.
She will occasionally let me put a flower or bow in her hair if it matches her outfit, but she quickly takes it out because she said its hurting her head.
But when I purchased a similar headband recently, she wore it all day long.
And I was like
"Yes, finally, I've gotta make this
girl some headbands!"
These are super easy to make.
The best part about making these headbands is you can use fabric fat quarters, and of course...
your left over fabric scraps.
First off let me just tell you how addicted I am to Fat Quarters.
At Joann's you can buy them for $1, so you can buy a lot. I tend to spend at least $10 in fat quarters every time, I go.
I mean just look at the pretty patterns, eek!
You'll also need some kind of elastic.
I use the fold over (baby headband elastic)
For kids headbands I cut about 5 inches.
I've made a template, and all you have to do is right click to save the image and print it.
Actually you can just print it right from here.
If you are a Windows PC user then when you print, select full page so its the correct size.
It's best to print this on card stock so you can easily trace it onto your fabric.
I usually fold mine inside out, so the marks are on the right side.
Fold your fabric, and place the wider end where the arrow is on the fold, trace it and cut it out,
you'll need two of these.
To make it reversible cut the second one out in a different pattern.
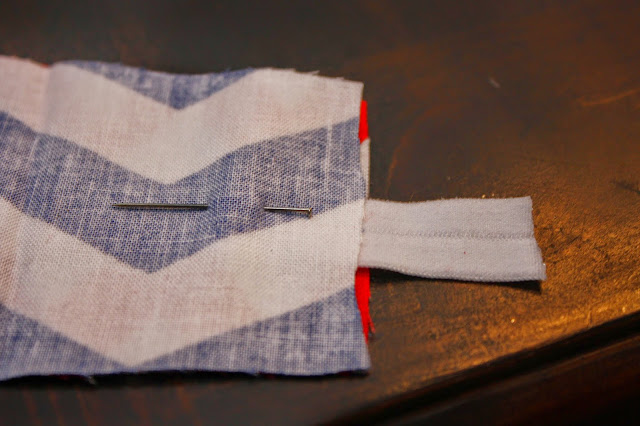
Place the right sides together and pin your elastic on one side pointing long side downwards.
I leave about 3/4 inch of the elastic hanging out.
Using your sewing machine footer as your guide place the footer on the inside of the footer,
and sew the sides of your headband.
Now, again place the footer on the inside right edge footer and sew from each stitch on the sides to each stitch across the top where the elastic meets.
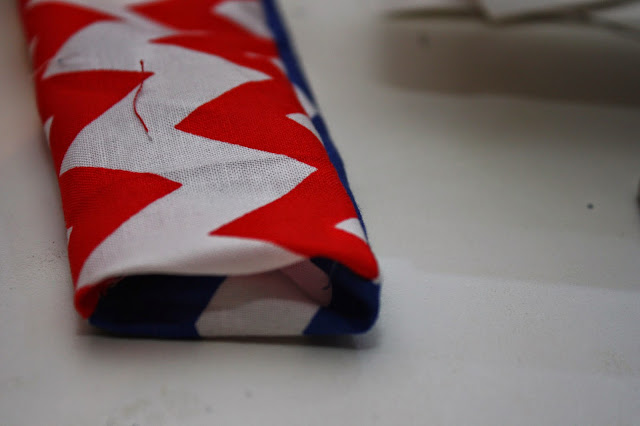
Turn it inside out,
and tuck in the ends into the headband.
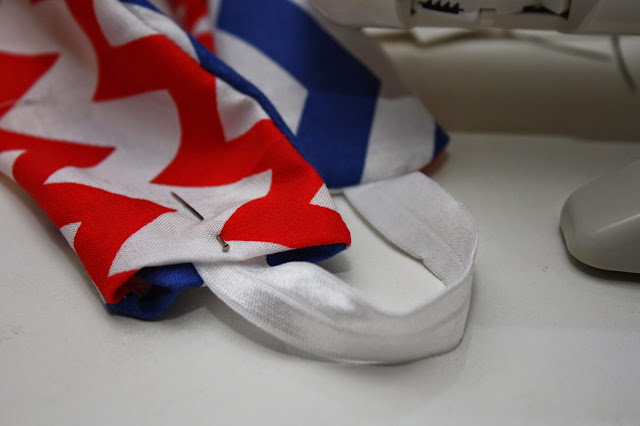
Place the other side of the elastic (make sure not to twist) and pin together to make sure it stays secure.
This time I tend sew to as close as the edge of the fabric as possible and I sew it back and forth about 4-5 times to make sure its nice and secure.
Then snip off all your unwanted strings,
iron it to keep the seems in place,
and you're done!
If you notice closely in the other photos I have stitching on the ends, this was because I was doing it the hard and WRONG way. But you can stitch on both sides all the way up and down if you want a stitched look.
My daughter loves that she can go and choose either side.
I made one for her friend, and she's been wearing it daily. Hmm, may need to make her more too!
Until Next Time...


Thanks so much. I'm going to pin this & add it to my sewing ideas to try board on FB. I don't have a followers there so I and a friend will be the only ones to see it right now.... :(
ReplyDeleteI want to make some of these up for one of my little daycare girls. She has funky hair and likes headbands but I've had trouble finding ones that fit her head. These will be perfect!
I love projects that use up scraps. These would be great stocking stuffers. Thanks for sharing.
ReplyDeleteThese are brilliant. My daughter wore hairbands a lot when she was younger, they are so good for those school morning when there is no time for anything fancy!
ReplyDeleteThese are so cute, and they're a great idea. Thanks for linking up and sharing with us at Funtastic Friday. Hope you join us again this week.
ReplyDeleteI love these and I'm totally going to pin this!
ReplyDeleteThanks for sharing at the Wake Up Wednesday Linky Party!
Love projects that I can use scrap fabrics. Thanks for sharing on Merry Monday. Pinned.
ReplyDeleteLove these! i have four granddaughters who are always pushing hair off their faces, bet they'll love these! Thanks for sharing.
ReplyDeleteThis is a great tutorial for some seriously cute headbands! I would love for you to link up to the Stitch It, Blog It, Share It Link Party going on now at BehindtheSeamsSewing.com.
ReplyDelete~Bonnie
Your past was chosen as a feature for this week's Wake Up Wednesday Linky Party! I hope you grab our featured button and join us again this week! http://tulipsorchids.com/wake-up-wednesday-3/
ReplyDelete