

Good Morning, and Happy Monday my beautiful readers! I hope everyone had a wonderful weekend! I spent the weekend trying to survive a sinus infection. It may just be time to go into the doctor, pout, pout!
That's ok, because I'm so excited today to have guest blogger
Ashley from:

 Hi, I’m Ashley and I blog at Homemaking Challenged about my
challenges in the area of homemaking. No matter how hard I try, things don’t always go to plan, but I’m trying
to grow in this area, and share everything from recipes to projects around the
house to encouragement and tips for the modern homemaker.
Hi, I’m Ashley and I blog at Homemaking Challenged about my
challenges in the area of homemaking. No matter how hard I try, things don’t always go to plan, but I’m trying
to grow in this area, and share everything from recipes to projects around the
house to encouragement and tips for the modern homemaker.
I’m so honored that Allie is letting me share this tutorial
with you. Today I will show you an easy way to make placemats, and I do mean EASY.
It all started when I fell in love with some curtains. I was then “forced” to paint our wall grey. Then I found a matching tablecloth
for the curtains, I bought it and placed it on the table, however it was too matchy/matchy and I was not a fan. So what is a girl to do but turn that
tablecloth into placemats for our family.
Here is how I did it.

First you must, gather your supplies:
- An old placemat (to use as a template)
- Fabric (I used a tablecloth - bonus because it already has some seams)
- Iron
- Ironing board
- Heat n Bond hem
- Paper bag
- Pencil
- Scissors
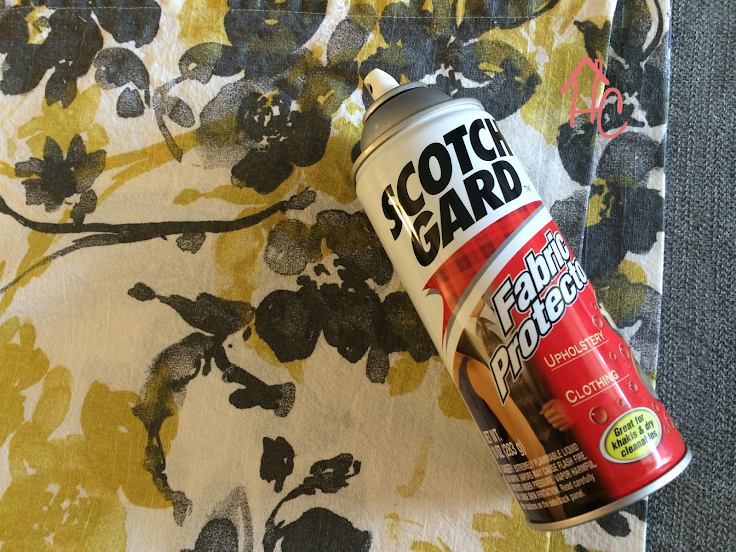
- Scotch guard
Heat up your iron, and then using your template, mark 1/4’’
around the template with your pencil.

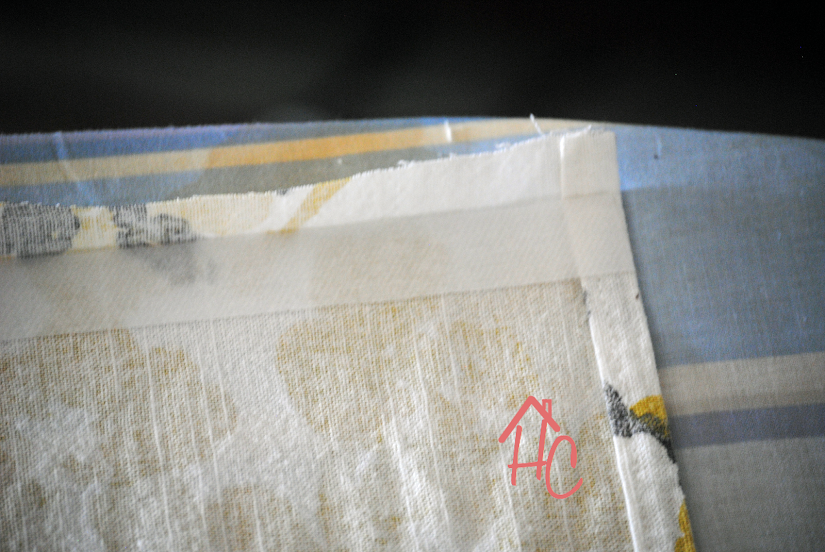
Cut out the fabric. Fold
your seam and press with the iron.

Place your heat n bond under the pressed seam.
Cover the seam with the
paper bag and slowly move your iron over it. Remove paper bag and repeat the process for each seam.

The paper bag is important so the extra bond gets on it, instead of your project or iron!

And TA-DA!
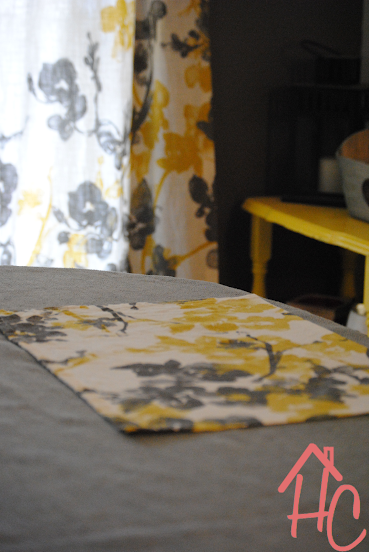
It really is a simple and easy process, I did four placemats in about 20 minutes and that was with taking pictures.
The final step is a must for those who have kids, scotch
guard those babies so that they stay nicer longer.
Secrets for Success:
- Don’t skip the pre-iron step, I know it is tempting, but it makes a big difference.
- Flip it over to the front to check that it is the way you want it after you iron the seams and before you press it with the bond.
- Cut the top layer of each corner at an angle so that they line up nicely
- Don’t move the paper bag away too fast, but make sure it is still warm to the touch when you do, so that it takes all of the extra glue off your fabric with it.
- Don’t put them in the dryer! Heat is what is holding them together, and the dryer may unseal it. If you want to be able to dry it, then you will need to stitch it.
- They don’t have to be perfect, even the ones I bought from the store aren't perfectly strait.
Fabulous tutorial, especially for those who sometimes don't get the seams straight
(a-hem, not me, lol). I love that pattern too, so lovely!
Thank yo so much Ashley for your wonderful post ,
and thank you all for tuning in today!
Until Next Time...

Stay tuned tomorrow to see who the winner is of the
Dakotawitch Bath and Relaxation Giveaway!
Also stick around to enter a Lip Balm and Scrub Giveaway!
This post was featured on:


Lovely easy idea,love it and they are so pretty. I am visiting from Creative K Kids,I'll be back :)
ReplyDeleteGreat idea and great tutorial on making no sew placemats. This is a great way to having new placemats for any event or to match any color combinations. Thank you for sharing with the Clever Chicks Blog Hop! I hope you’ll join us again next week!
ReplyDeleteCheers,
Kathy Shea Mormino
The Chicken Chick
http://www.The-Chicken-Chick.com
Great idea! Thanks for sharing it with us! :)
ReplyDeleteSince I can't sew, I love no sew projects! Pinned! Sending love your way! Lou Lou Girls
ReplyDeletebrilliant idea! Anyone (with an iron) could do this and have lovely placemats! Thanks for sharing!
ReplyDeleteGreat idea for non-sewers! And they match the decor.
ReplyDeleteNoreen
Crafty Journal
I love no-sewing projects! I've just pinned this and given your post a +1!
ReplyDeleteThanks for sharing at the Say G'day Saturday linky party.
Best wishes and hope you can join in again this weekend.
Natasha in Oz
I am featuring this tomorrow on the Bloggers Brags Pinterest Party on Creative K Kids. Thanks for linking up last week! I can sew, but love to see the no sew features for others!
ReplyDeleteThanks for the great tutorial! I'll definitely try making these placemats soon.
ReplyDeleteok so dont put in the dryer but can they be tossed into the washer and lined dried?
ReplyDeleteHello! I was looking for a fun new project to start and I came across your awesome place mats. I am now trying to make my mother in law some for her birthday.
ReplyDeleteGretta Hewson
Austin Personal Injury Lawyer