UA-59651954-28 Crafty Allie

Friday, May 17, 2013

Bean Bag Makeover! Revamped old bean bag chair!


I might be the world's worst mother! Ok, well maybe that's an exaggeration, and hopefully I made up for my slacking tendencies today. 

Back in October I redid my son's room in Army/Camo decor. I recovered his bean bag (quite badly I might add), and ever since then my daughter has been begging me like every week to recover hers in zebra print. I bought the fabric back in October to do hers, and oopsie, its taking me this long to do it. Hey, I have had a lot of projects; hers was on the bottom of my priority list.

Ok, so this fabric is fleece, its actually two blankets from Walmart. I got them for only $2.88. When I saw them, I did a happy dance, because I knew I had just saved my self about $20. Fleece is usually $10 a yard. 


Now this is not super thick, but I am ok with that! Its to cover up her old bean bag, not to be used as a blanket. With that I might add, if you ever see a cute pattern on a blanket at Walmart or any store for that matter, and its really cheap, get it. Even if you don't have a project in mind, snag it!
I have done a few projects from blankets. It doesn't have to be fleece. I love it too when they clearance their patterned bed sheets. Sheets are a lot of yards, and that = saving money.

Ok, moving on...
First, if you have a piece of card board or a poster board then free hand on one side of the board, a wedge shape. Then fold it in half and cut to make it equal.

As you can see by my photo, I didn't even cut it that straight, and that's ok. When I traced the pattern on the fabric, I tried cutting it straighter. But thats the wonder of sewing. You can correct your uneven lines. Ok well, at least you can in this project.

Then I put up my half surfboard looking pattern and traced it then flipped it over and made a mirror effect so it really does look like a surfboard pattern when you done. Ok, well a small surfboard, lol.


Then, cut 5 more just like this. I was able to make four wedges per blanket, leaving me with a half of blanket left for some other project. YAY!

Next sew each wedge together in 2 sets of 3's. Say what.. I know. Ok... sew one wedge to the other, making sure to sew only one side and right sides together. 


Then, take another wedge and sew it to the second wedge. One thing I should add is not to sew the tips. Start sewing on the top of the side. I made this mistake :(


After you have sewn 3, then make another set of three. Do not attach them all together. You want two sets of three wedges.


Now that you have your two sets you can sew them together. I found though I had to sew the top together first then sew one side, and then go back to sew the other side, because you do want to leave big hole on the bottom to feed the bean bag in. Now if your making your own bean bag, well then the hole doesn't have to be that big.


Getting the bean bag into the hole is a bit tricky. I didn't make a big enough hole, but had my husband help me get it in, by re-positioning the styrofoam beans in the bag. I can't even explain it to  you, but team work helped. Thanks Honey!


The hole was bigger than that, I promise (the photo just doesn't show it). 

Then I sewed it up on the bottom. Now, I could have gotten fancy and done a zipper, or snaps, or something, but hey I just didn't care! I mean its not like anyone will ever know. In fact, its quite a crappy sew job underneath. If I wanted to make it look nice I could have carefully pinned them under and then together so it had a nice finish. I will say though its not easy to sew it once its on the bean bag. You will for sure need plenty of room to put your bean bag up on the same level as the sewing machine, or just sew it by hand. Eew no, takes too long. No thanks!


I love the way it looks. It looks so much better than my son's. And of course now he wants me to redo his again. Ughh, I'd have to be really bored to do that. Maybe if I get snowed in, lol. Ya right, I'll be cuddled up in my flannel sheets if that happens!

If your more of a hands on video type, here is where my inspiration came from. Not my video, but it helped get a visual on how to cut and sew it all :)


Thanks for tuning in! 


Thursday, May 16, 2013

Rangers (baseball) T Shirt Dress How-TO


Well, well, well, its that time again! Time for Baseball! 
I had a friend ask me to make her a dress from her over sized shirt, and of course I was up for the challenge.

So without further ado...


You will need:

Two t shirts ( one with the team you desire big enough to cut up and another one the same size for the bottom trim)

Elastic two sizes 1/2 inch and 1/4 inch

safety pin

ribbon

matching thread


The above list is probably obvious but hey, I sometimes decide to do a project and then forget I don't have the elastic, etc.

Anyway...

I first started by having my friend try it on. I measured how much on each side I needed to take in. On hers I needed to take it in about 1 inch on both sides.

I then measured how long the dress needed to be. We decided on 26 inches for her.

I then flipped the shirt inside out and began pinning it and marking where I needed to sew it...

As you can see I actually measured a little tiny more than 1 inch. I knew we had a lot of room though to work with. But accuracy is the best for sure.

Then sew both sides, and then cut it afterwards leaving about 1/8 inch hang over.

Then make a straight line across the top of the shirt as close to the collar as possible.


Then cut and fold down about 1/16 inch and sew. Then flip it down again about 3/4 and inch and sew again. Sorry I was tired and forgot to take pics of this process. 
The reason I say to sew 1/16 first is so that there will be a nice finish. Its hard to fold it under and have it stay put. Its easier and quicker to sew it and then go back and sew again. When you sew the 3/4 fold be sure to start at one of the side seams and when you make your way all the way back around stop about on the other side of the seam, leaving a pocket to insert the elastic in.

Once you have done that, get your safety pin and pin it to one of the 1/2 inch elastic. Feed it all the way through, making it as tight or loose as you desire. Then sew the two end pieces together and then sewing back the elastic opening.

Now put the top on you or on your model and decide where you breast end in the shirt. You should add your second elastic about 1/4 inch below that mark.

Then again at the same seam you started your top piece, began sewing in the elastic but immediately start tugging on it so that it will be tight and gathered.

Continue holding and tugging on the elastic the entire time you sew it on, don't let go at all while you foot is on that pedal.

After that measure the shirt, and when you make your bottom ruffles make sure you cut it accordingly to how long you want the total length of the dress to be. Based on that then cut your bottom piece. I did mine 6 inches. The dress was 22 inches long before the bottom part. And I cut an extra 2 inches to have room to make the ruffles and then sew it on.

If your using a t shirt material then you'll need to stretch it about twice the width of your dress, so that you it will be the correct width after ruffling it.
Then starting at the seam, (if there is one) go around using the highest stitch. I set mine on 9. And slowly go around about 1 1/2 inches down from the top. Remember when you start sewing not to back sew, you want to be able to pull on those threads. When you end it, then you should back sew so it won't unravel. Remember not to cut the beginning or the end threads after you sew it.

Then pull on the threads slowly pulling the ruffles down as you go, until the entire piece has been ruffled. Then take your threads from the beginning and then end and tie them together, this will keep your starting point from unraveling.

Then sew it onto the dress going above the stich but high enough to where you can't see the ruffle stitches. Then after that add your trim or ribbon to complete it. Sorry I wish I had taken more pictures. I was so tired when doing this

Here is the end result...


Looking at this picture it could have been ruffled a bit more at the ends and we should have cut the shirt more like 3/4 inch wide but likes it tight :)
 For kicks I took the left overs and made t shirt flowers out of it, and made a hair clip out of them These pics is not good though, as you can still see the hot glue before I picked it off. Oops.


And there ya have it, without interruptions this would take about 1 hour. I had two kid bothering me constantly, lol. All while trying to cook in between.

Thanks for tuning in! If you have any questions, just holla! Oh and don't forget to follow me ;)


Monday, May 6, 2013

10 Gift Ideas for Teacher's Appreciation Week


Yep this week is Teacher's Appreciation WEEK! Here are 10 ideas you and your child can make or give to your teacher...
               1)
Ceramic Tile Coasters


Not the best paint job, but keep in my 7 year old helped do them. Considering that, I think they turned out quite well!

We already had the ceramic tiles, however you can get them very cheaply like less than 50 cents per tile at Home Depot or Walmart.
Then we used these stencils, I already had those as well but you can get them at Walmart in their craft section.
You could also use photo's, which we intend on doing for our Mother's day presents for our Grandmothers.

We used regular craft/acrylic paint to stencil it on, then after it dried we put on a total of 3 decoupage layers to seal in the paint. Then we cut 12 pieces of small black felt fabric. If you don't have this already you can buy the felt stick on's or buy a 39 cent sheet at Walmart. It also doesn't have to be black it can be any color, so if you have something like that you can cut up, then by all means do it and save money :)


 The we tacked it down to the bottom of the coasters using tacky glue. Really any super glue or hot glue would work, this is what I use for a lot of stuff though, and it seems to be the easiest and quickest. Plus you can get it cheap :), always a plus.


                    2)

Homemade Salsa


Really it can be anything homemade,  we just happen to be masters of salsa making. Plus this was a  gift for my son to bring to his teacher so we wanted to give something she would like but still had a masculine quality. We paired it with a bag of tortilla chips.

The jar is left over from some queso I believe, but we recycle around our house! The label was made on Print Works Paper, and just our regular ink jet printer. I have to say this label turned out too big and I am just to tired to redo it all. So it will do! But in the past we have made better labels for our hot sauce like this...
 

We made a new one since we knew the word Damn wasn't appropriate for school!
We put tack it down with decoupage and then layer 3 times on the top so it is water resistant.


               3)
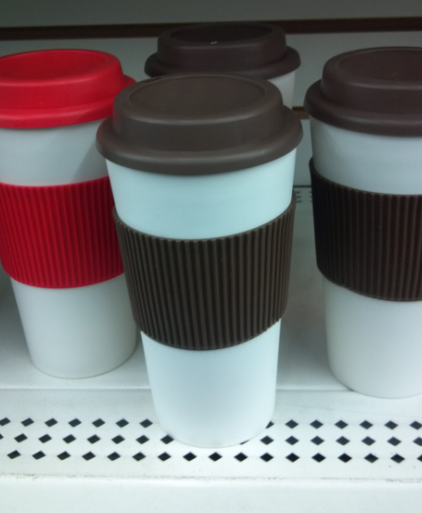
Dollar Tree Coffee Mug with Hot Coffee

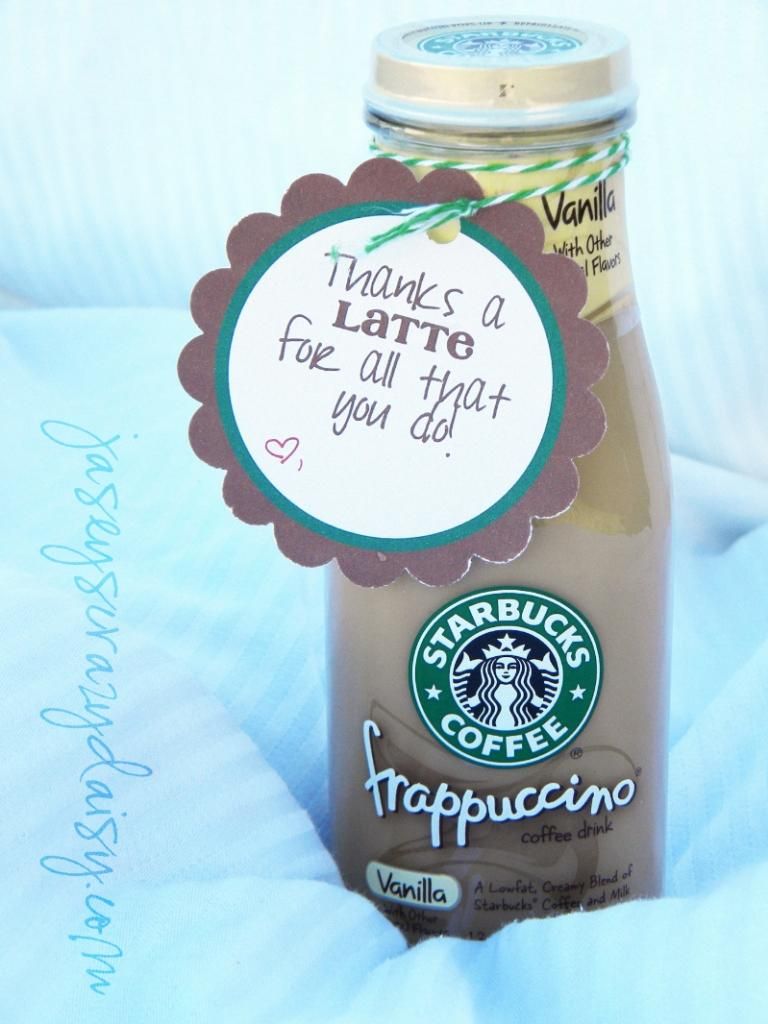
I thought about going and just getting Starbucks but you know I have 2 kids to buy teacher presents for. I also don't like Starbucks, and I hate the long lines in the morning. That's when I decided to just buy some disposable cups with lids and then I saw these. I was like Ohhh ya, Bingo. 
I haven't done it yet, but I plan on cutting the teacher's names out and putting them on the cup. On Wednesday morning, I'll pop in some French Vanilla Cappacino Coffee into my Keurig and then I'll go with the kids to drop them off to their teachers. I think I might make a tag like this to go on them too!

You can get one free here at Jasey's Crazy Designs
4)
image


These are only $1 of course duh, you see the ad above. The possibilities are endless with these. I think though I'll wait to use this idea till the last day of school teacher gift, fill it with come crystal light packets, and there ya go!

5)
spring craft idea flower pens in a spring pot

I love that you can buy the pots and the pens, and the flowers at the dollar store, they may even have the floral tape. This is not my photo, but links back to the blog it belongs to.
I also like this idea if you have the patience and extra money for painting on chalkboard paint...


6)
Teacher Gift
Monogrammed letter of the teacher's last name.
I love, love this idea and hope to do it as one of our last day of school presents! Again not my idea, but you can click on her picture for a tutorial!

7)
A jar full of tea!

I love tea, and don't know a whole lot of women who don't. Spruce up and old jar with some material and a printable tag!
Hop on over to TOMKAT Studio for tons of free printables!
8)
Plants

Isn't it cute? I love the simplicity of it. You can get the plant at Walmart, Home Depot, Lowes, and if your on budget like I always am, then head over to the good ole' Dollar tree for a holder for it!

9)
Swedish Fish Candy

OMG, I love this one, so cheap too! Again, the dollar store is calling my name, and you can again get a free printable here at eighteen25.

and last but not least...
10)
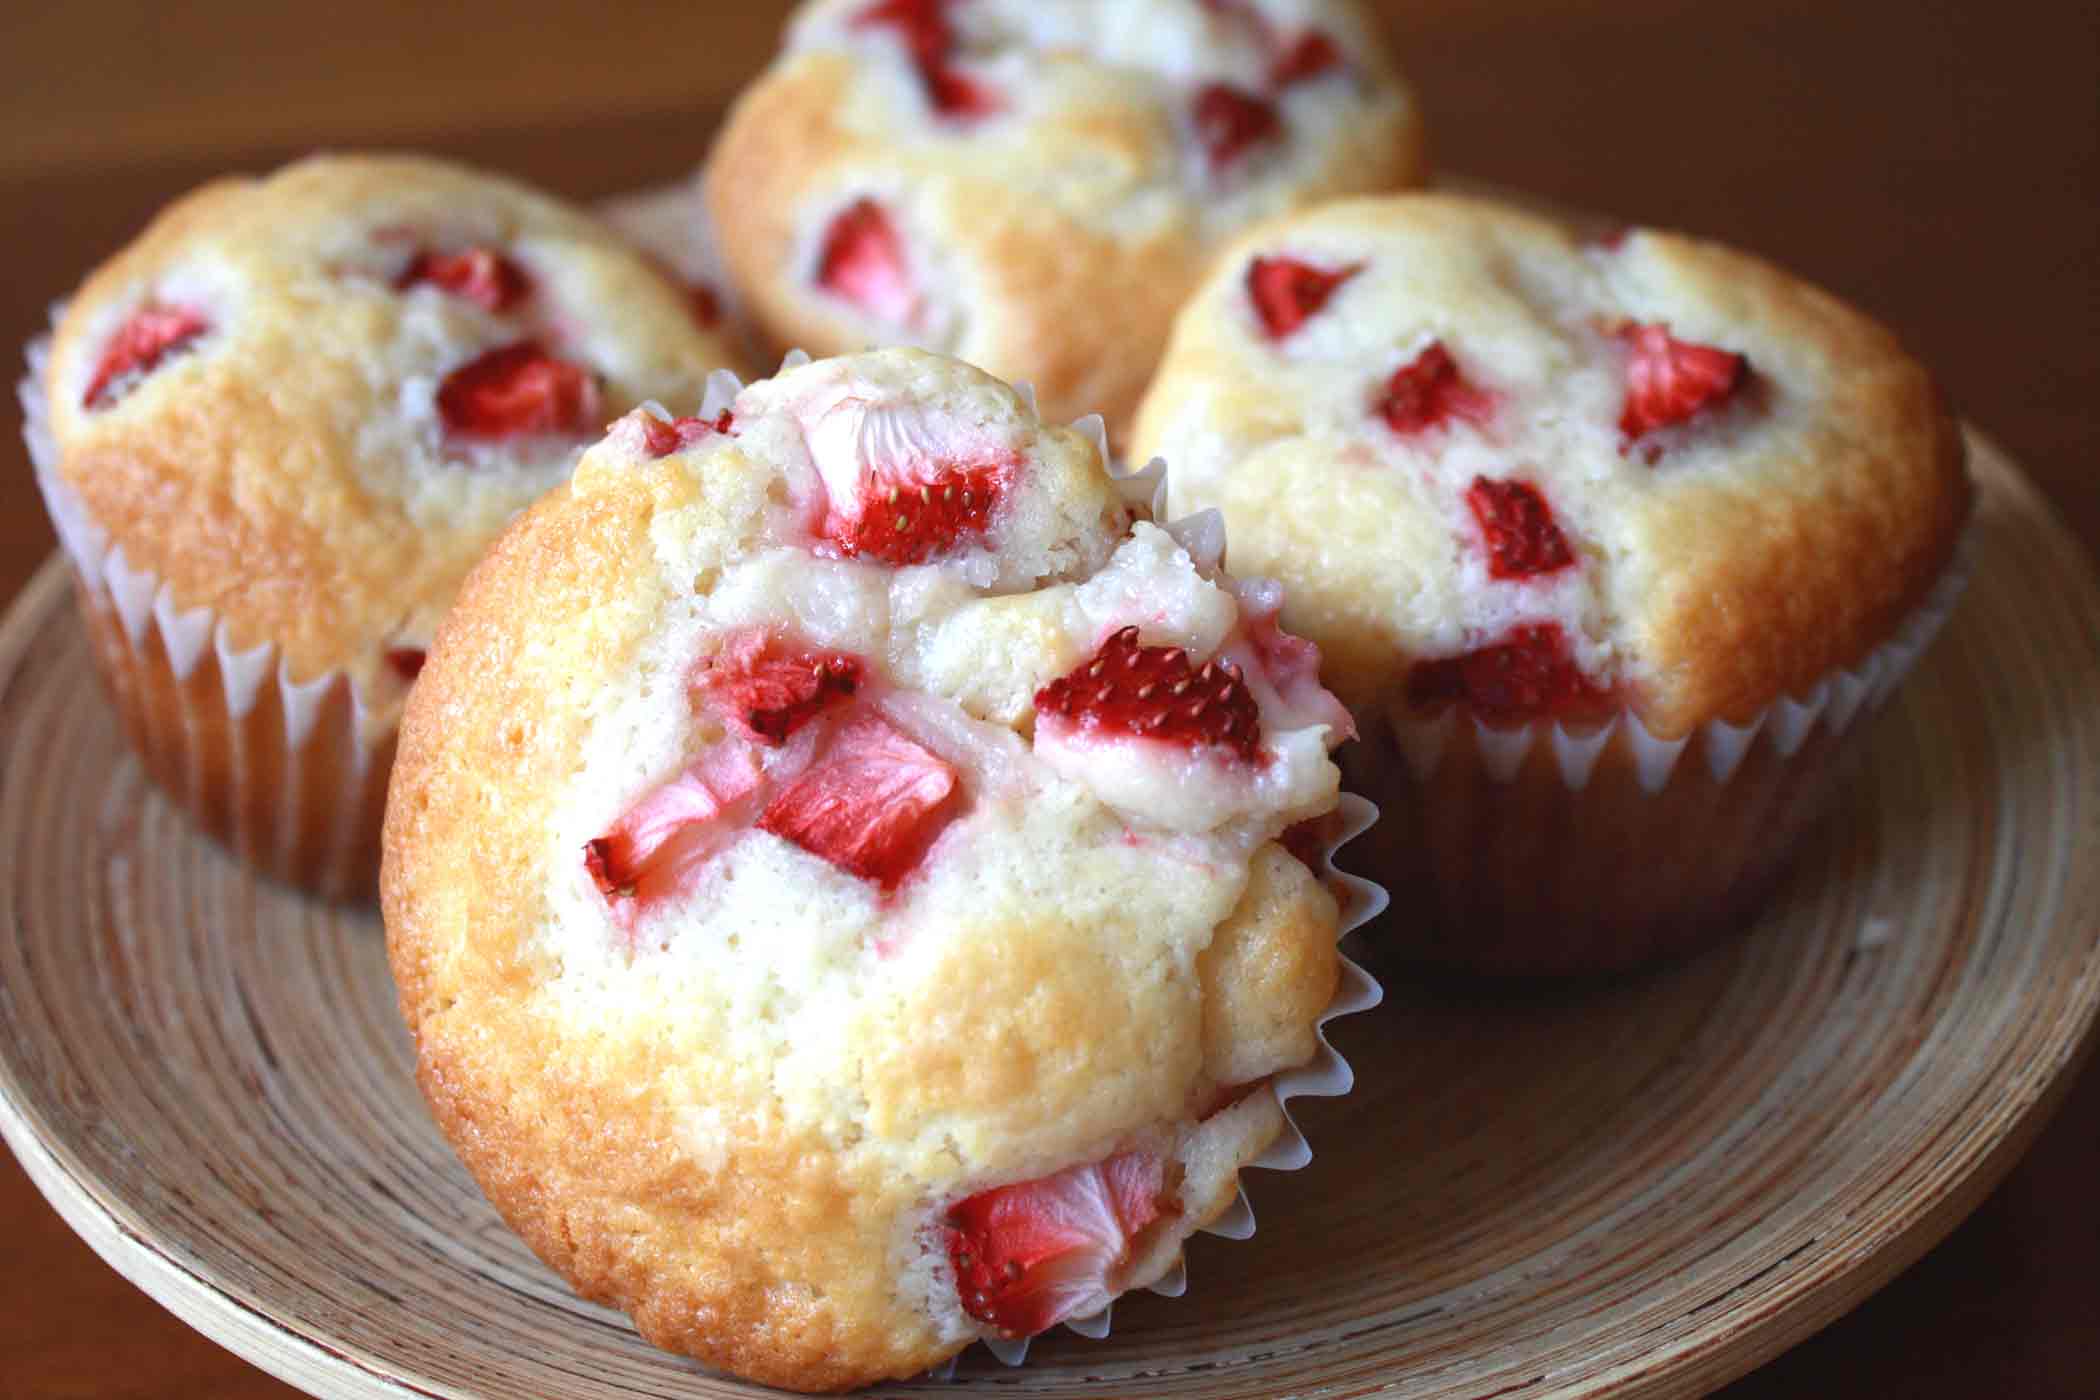
Yummy to my tummy muffins!

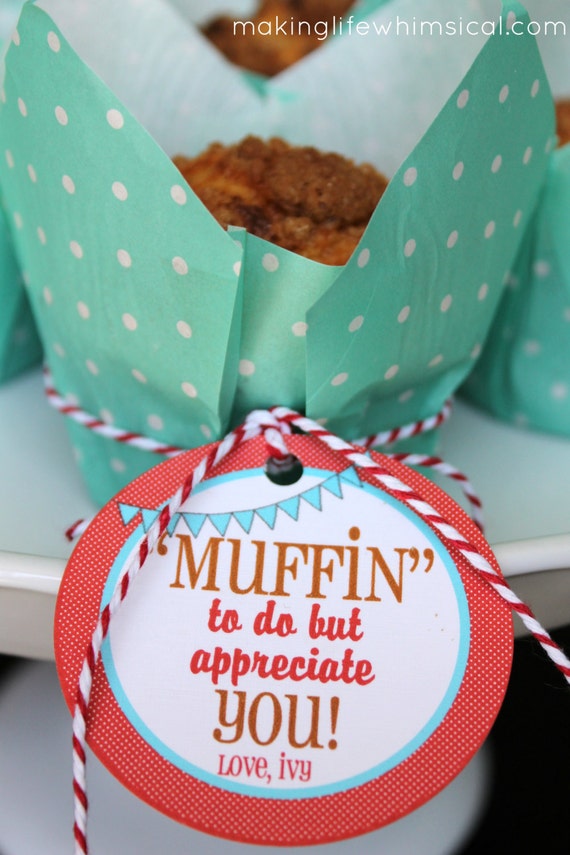
Don't those look to die for. It doesn't have to be that fancy, and you don't have to make yours from scratch. Heck if you burn water, then go and buy some from the bakery at your local grocery store. But for sure if you make them get some cup cake liners and when your done put them in a super cute container or box  or even some tissue paper and then with maybe something like this kind of tag.

Muffin Teacher Appreciation Personalized Printable Tag

I couldn't find a freebie, so I may just make this on my own. But if you want to buy it, you can from Making Life Whimsical on Etsy.

This year I lucked out and our last day of teacher appreciation week is on Field Day! So this will be perfect for our teachers that need to get their energy up with some breakfast muffins. I might have to do the coffee thing again too, or maybe milk, hmmm.

Thanks for tuning in Hope I gave you some great ideas for Teacher Appreciation Week!


Sunday, April 28, 2013

The Best Chicken Tortilla Soup EVER!


I don't mean to brag, but this was the best by far I have ever made, or had tasted in my entire life.
I actually got the idea off of pinterest, but I added a few of my own choices.

So lets begin...

Ingredients:

2 Chicken Breasts
1 can of Sweet whole Corn (whole corn not the mushy kind)
1 can of Black Beans
1 diced Yellow or Red Onion
1/2 bushel of Cilantro
1 can of Tomato sauce
1 large can of diced tomatoes (or large can of Rotel)
3 tbs of Garlic Salt
1 tbs of lime juice
Colby Jack Shredded Cheese (as much as you want its of the top)
Tortilla Chips
Avocado (optional)

Thoroughly cook your chicken, by either baking it or rotisserie.

After its cooked cut into tiny cubes or shred it.

In a large pot or crock pot add the chicken and all of the ingredients (except for the cheese, tortilla chips and Avocado).

Cook on medium for about 20 minutes stirring occasionally, then let it stew for at least 3 hours on low.

Place your soup in the bowl add desired amount of cheese, sliced avocado slices, and tortilla chips and ENJOY!

You may want a margarita with it, because its so yummy! I'll have to post my famous Margarita recipe some day!

Thanks for tuning in folks!


Sunday, April 21, 2013

A New Life (repainted 50's dresser)


I had the best weekend ever! It started out with spending the night at my sisters on Friday, no kids, no husband, just SISTER time.

Had a great Saturday night gambling at Winstar in Oklahoma with my good friends and Hubby!

Sunday ended with a revamp of this 50's dresser!


On Saturday morning, my sister and I went garage sale-ing. One of our favorite things to do together! We got some really great deals, but the big sha-bang was finding this 50's dresser.

Yep, bought her for only $20!!! Eeekkk! I am still just so excited. I am excited because it's SOLID wood, and it has cedar lined drawers. I mean this high quality my friends!

Anytime you can find and old dresser with cedar lined drawers for a cheap price, snag it!

I already had the paint, so literally this baby only cost me $20!

I sanded it down just a little bit first, removing some big clumps of paint and or stains, then I began painting it with this BABY...
It's a Graco Spraystation 2900. I bought it last year to paint my craft room furniture. I love it, and one day maybe I'll paint the house with it.
You can cut down your painting by several hours. Its spays very evenly, and doesn't make a huge mess. I would definitely paint outside with it, unless you have everything near by covered, including the floor, because its a sprayer and it does get on things a little bit, plus if your startled and your hand is on the trigger, for sure other things could be sprayed.

It was a little bit windy this afternoon, so I moved the cars far down the driveway, and all was good.

The paint is a Black Primer plus Paint by Behr.

 However, normally I would paint it with a coat of oil based paint first to make sure it doesn't chip. I already had this, and well I was in a hurry to get it done. I am sure I'll regret it, but it works for now!


I painted the whole thing first, and then once it seemed to be a little dried I took out the drawers and painted on the sides of the drawers and on the sides inside the dresser to make sure none of the old white paint showed.

I absolutely LOVE It! It's for my son's room. He has had a small one since he was 2 years old in his room and he has out grown it. I have known for about 2 years now that he needed a bigger dresser, but its one of these things where I knew patience would pay off. Most the time the ones I see are either not the right style, too big, or way too expensive. So needless to say, I am glad I waited and found one for cheap and really great quality. And... if he so decides he wants to keep it forever, it can go with him when he moves out.

Well, there ya have it. Hope you got some new idears. Painting old (or new) isn't hard at all, just takes a little  hunting and some elbow grease. But in this case if ya have a sprayer, its not hard at all. And look its a beautiful new piece. I kind of want it for my room :(

Thanks for tuning in!

Monday, April 8, 2013

Letter Photo Art


I'm so exited to share this craft with you guys! 
My entry hall has been in some major need of redecorating! I mean I've been in my house for 11 years and I have had the same pictures up in the entry hall, even my husband was tired of them. Now that is pretty sad, when a man gets involved!

So for months now, ok at least a year, I've been thinking about how to change it up. A couple of months ago I saw a great idea on pintrest. So here is where my inspiration came from:


She has the most amazing site, so go on out and tour her blog, you'll love it! (click on the image to be directed to her blog).

Anyway, so I've wanted to do this for a while, just had way to many other projects going on, but a couple of weeks ago I found a rod iron hook decor at a  garage sale and I knew it was fate, that I start my project soon.

So without further ado...

Supplies:
Paint brush or mini roller brush
Paint
Sand Paper
cheap frames
hot glue/and hot glue gun
Wood board (8 inches in length, width depends on how long your name is)
photo letter pictures

Here is the before photo of the board I got.

So, yes pat myself on the back, got it a home depot in the scraps section for $1. Yep that's right, $1. But when I got it home my husband is like "cool, but you know its warped, well bowed".So then I said "so, Adds Character". He said it would be fine as long as I used the flatter side. But later I found that it mattered a little more than I anticipated. It was difficult to adhere the frames, because of it not being level :(  Live and learn, live and Learn. There were more to choose from, I just wanted this length, because I didn't have to have my husband cut it.

Anyway, I then sanded it down with a 60 grain sand paper on all of the edges. By the way make you sure you get a rag and really wipe hard to get the sand paper off. I used my hand, and well there were still grits of sand here and there. Live and learn!

I painted  with a Behr Sampler. If you've read my school desk makeover then you already know that this is the best crafters paint ever. Its only $3 and you choose the color, and they mix it. The color I chose was Country Club. 
Ohhh so Ritzy! 
I don't think many country clubers make their own stuff like this though, lol.

While letting it dry, I spray painted my iron hook thingy!


I used a flat black spray paint that is only $1 at home depot.

Then a little while later (like 20 minutes) I applied another coat to the board, then went back and flipped my rod and did the back, then later went and sprayed down the top one more time.

After the paint was dry on the board I, put my photo letters in their frames. I got these letters off of the web. I just googled photo letters, and typed in the letter I wanted. Now, most are going to be copy right stamped, but a few aren't. Those are the ones I nabbed. I then uploaded it to my local photo processing store, and it only costs $6 for all letters. Oh and by the way, two were not black and white, so I did go and make them that way.

After, I put the pictues in their frames, I then pulled off the stand and hook parts so it would lay flat on the board. I had my husband carefully measure how far apart each one should be, then I hot glued them down the board, one by one. As mentioned above it took a few times to make sure it was secure since my board wasn't level. 

After we attached them, we flipped it over and put on two hanger hooks. You may need more if your board is larger than mine (my board was 18 inches long). After we attached the hooks, we realized that we should have attached those before putting the frames on, one ended up falling off from the movement. But that is ok, that just means that one needed more glue and would have eventually fallen off.

Now for the last step, see next to my E, it says est. in 2001. That is oracal vinyl cut from my cricut. I was determined to squeeze it on there. I love it on there!

So this is the before pictures of my pitiful decor...

And this is the after photo...


Ahh, much better! Total cost of this project was only $14.
$1 for the board, $3 for the paint, $4 for the frames (each $1), $1 for the hanger hooks and then $4 for the rod iron, and $1 for spray paint I love, love, love how it all turned out!


                                     Thanks for tuning in!
                                        Until Next time...


Thursday, April 4, 2013

Best Veggie Casserol

Ok my non-existent fans. Ok, I take that back, I think I have one follower. I am here again, but not so much for a crafty moment. Although, I guess the definition could vary of the word Crafty. Hold on gotta go look it up now....

Craft:  To use skill in making something. 


Ok, were good, I made it by hand and used my hard core 


skills! Lmao!


Well today I am here to share my original recipe. I thought it 

up while thinking of another recipe. It is very similar to Texas 

Potatoes.


Ingredients:


18 oz can of cream chicken

2 cans of mixed veggies

1 bag of shredded frozen hash browns

2 tbs of garlic salt

1 tbs dill

3/4 of a large Onion

1/2 cup of margarine

1 box of chicken flavor stuffing

2 cups of shredded cheddar cheese

2 tbs of garlic salt

1 tbs dill


PREHEAT OVEN TO 350 degrees


1) Thaw hash browns


2) Chop and saute the onions with about 2 tbs of margarine of olive oil

3)Mix the onions, hash browns, cream of chicken, mixed veggies, garlic salt, and dill all together in a large bowl. After mixing place in a large 9 x 12 Pyrex pan

4) cook for 40 minutes

5) the last 10 minutes melt 1/2 cup of butter in the microwave, then add it to the stuffing.

6) after the full 40 minutes, remove from the oven and evenly place the 2 cups of cheese on the top of the casserole, and then evenly spread the stuffing on top of that.

7) bake for an additional 15 minutes, then remove an let cool.

8) Enjoy!

Its easy, and pretty much thoughtless, goes great with chicken, pork chops, ham, and turkey. Also makes a great side dish for parties or family get togethers!

Thanks for tuning in!


Related Posts Plugin for WordPress, Blogger...